How do I Add image on my Product design template and format it?
Image Options
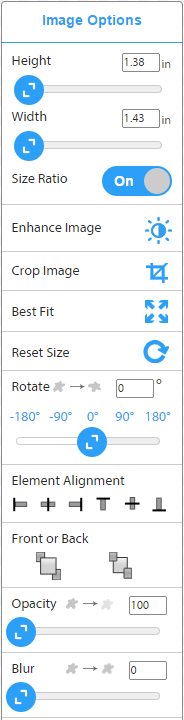
As soon as you add new image on canvas or click on an existing image, Image Options toolbar will open.
Following are the options available:
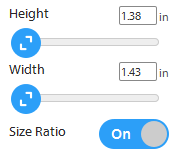
Height And Width
Height
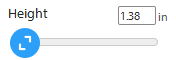
Hold the slider handle and drag left or right to decrease or increase the image height respectively. Alternatively, you can click on the plus (+) or minus (-) button to increase or decrease the height of image in steps.
Width
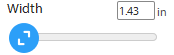
Hold the slider handle and drag left or right to decrease or increase the image width respectively. Alternatively, you can click on the plus (+) or minus (-) button to increase or decrease the width of image in steps.
Preserve Image Aspect Ratio
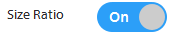
Images have original aspect ratio, ie, the ratio of image width to image height. By default, Pixopa Design Studio preserves the image aspect ratio. Hence, if you change the width of an image, its height will also change in the same ratio, and vice versa.
You may not like to preserve aspect ratio in some cases, and want to resize the image freely as per your wish. To do this, you can uncheck ‘Aspect Ratio’. Now, the image width or height can be resized freely without changing other dimension.
If you like to preserve aspect ratio, then click to check ‘Aspect Ratio’ again. Now, any change in image width or height will result in change in other dimension in the same ratio.
Resize to Best Resolution
 Resize image to best resolution
Clicking on this button will resize image so that it is of best resolution. Generally it is the original image size. The image will be aligned to top-left of canvas.
Rotate
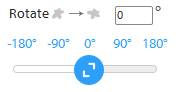
You can change the rotation angle of selected image using this option. Clicking on left button will rotate image anticlockwise by five degrees and clicking on right button will rotate image clockwise by five degrees.
Opacity
Change Opacity
Use this option to change opacity of image. 100 means image is completely opaque, 0 means it is transparent.
Change Opacity Slider
You can change the opacity of selected image using this option Click on the text box of blur value, type the new value and press enter – opacity value of object will be changed. Alternatively, you can click on up-down arrows to increase / decrease blur-value in steps.
Alignment
Left, Centre, Right Alignment
 Align image to left
 Align image centre
 Align image right
Clicking on this option aligns the object to left, centre, or right of page (horizontally).
Top, Middle, Bottom Alignment
 Align image to top
 Align image middle vertically
 Align image to bottom
Clicking on this option aligns the object to top, middle, bottom of page (vertically).
Bring to Front

Use this option to bring the selected object in front of every other object on canvas.
Send to Back

Use this option to send the selected object behind every other object on canvas.
Effects
Blur
You can change the Gaussian blur value of selected image using this option. Click on the text box of blur value, type the new value and press enter – blur value of object will be changed. Alternatively, you can click on up-down arrows to increase / decrease blur-value in steps.
Enhance Image
Pixopa introduces wide variety of image filters like sharpen, sepia, lemomnchiffon, polarid, posterize, vivid, grayscale, charcoal and many more . allows user to adjust brightness , blurreffect , contrast , Hue , and Saturation to enhance image.
Advanced
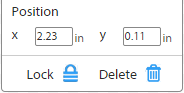
X, Y Coordinates [Image Position]
X Coordinates
 Set X coordinates for top left corner of image
Y Coordinates
Set Y coordinates for top left corner of image
X and Y coordinates determine the position of image on canvas. X and Y specify x and y coordinate of top left corner of image box. Click on the text box of any of X or Y, type the new value and press enter – top left corner of image selection box will be shifted to (x,y) position. Alternatively, you can click on up-down arrows to increase / decrease X, Y values in steps.
Width
Set widthClick on the text box of width, type the new value and press enter – width of image will change as per new value. Alternatively, you can click on up-down arrows to increase / decrease width values in steps.
Height
Set heightClick on the text box of height, type the new value and press enter – height of image will change as per new value. Alternatively, you can click on up-down arrows to increase / decrease height values in steps.
Crop
 Crop selected image
Use this option to crop the images. Select the image you want to crop and click on the crop button. Image will open in new popup, in which you can draw a rectangle and select the image area you want to show. Once you select the area, click on crop button on this popup (below scrollbar). The cropped image will be shown on the canvas.
Rotation Angle
Rotate imageYou can change the rotation angle of selected image using this option. Click on the text box of rotation angle, type the new value and press enter – image will be rotated with the specified angle. Alternatively, you can click on up-down arrows to increase / decrease rotation angle in steps.
Advanced
Lock Object

Use this option if you want to lock any image for editing. The locked image cannot be changed. All the editing options will be disabled, image cannot be moved or resized, and no editing will be possible.
Unlock Object
Once you click on ‘Lock Object’ button, image is locked and this button changes to ‘Unlock Object’. Clicking on this button will unlock the image again for editing. The image can now be changed. All the editing options will be enabled, image can be moved or resized, and editing will be possible.
Delete

Clicking on this button will delete the image permanently.